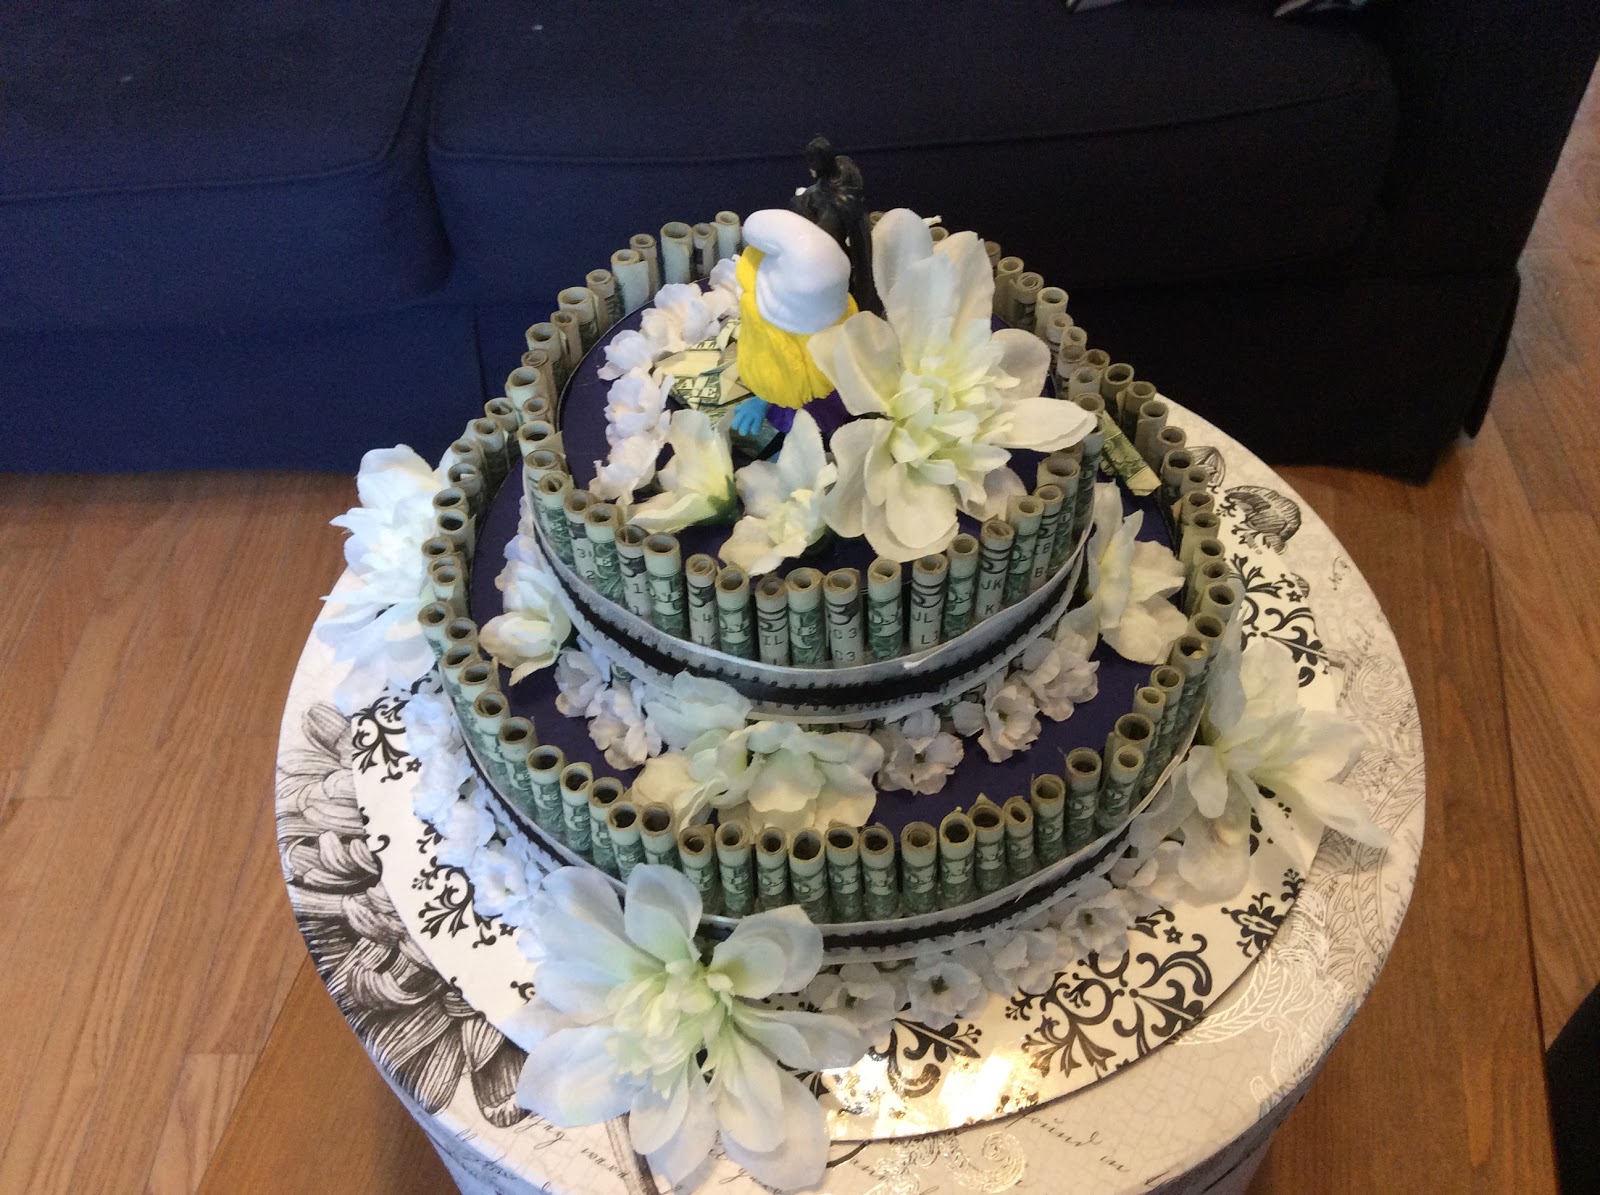
My husband and I have always been close to his cousin's family, the Moores. In fact, their children (his second cousins, mine by marriage), three boys, Jaysen, Torrey and Timmy were the nephews we never had for many years. Now we are blessed with several nephews but that doesn't change the special place in our heart and our home for the Moore Boys. They are smart, honorable, hard working young men whom we are very proud of.
As fate would have it one of the Moore Boys has been struck by cupid's arrow. Torrey is engaged to a beautiful young lady from the South, where he is stationed, serving our country. This is also evidence that I am aging faster than I would like to admit but let's not focus on that!
We had the opportunity over Easter weekend to celebrate their up coming nuptials. They didn't register for much, at least nothing that seemed quite special enough for such a dear family member. The truth is they are young and gifts cards and cash go along way. That being said, we hate giving gift cards or cash. We are very sentimental you see.
So what to do? Well, I found this post on Pinterest. The concept was great - a Money Cake, but it lacked the sentiment and that special touch. Knowing that the cash would go a long way towards starting their life together we settled on finding a way to make it special.
Naturally we went to the Dollar Store...
We bought some double sided tape, styrofoam discs, poster board and a batman figure. We used one of the green discs for the first level of the cake and we used three of the white discs for the second layer of the cake. Cut your poster board so that you can line the layers of the cake with it.
Then we went to Michaels...
We purchased some clear elastic bands (the kind used in the rainbow loom bracelet making kit that is all the rage these days), a hat box, cake boards, ribbon and some silk flowers.
Then we stopped at Toys R Us
There we found Smurfette.
Finally we went to the bank.
Depending on the size of your cake (ours is two layers) you'll need 200 one dollar bills or more. We chose a combination of one dollar bills and five dollar bills. This cake was made with 100 dollar bills and $150 in five dollar bills. In the end we didn't use approximately $28 which we just through in the card to keep it a nice round number. You cannot plan your exact amount as it is quite impossible, so just guess and go with it.
The first thing and the longest task is rolling the money. The elastics hold the rolls tight.
If you want uniformity, roll them all the same direction. We chose to roll the ones green side out and the fives opposite for contrast. We also chose to put the ones on the bottom layer and to alternate fives and ones on the top layer.
Once your money is rolled you are ready to start assembling your cake. Get out the hot glue gun. First glue the poster board to each layer (top and sides), then glue the bottom layer to the cake board and the top layer to the bottom layer.
Next, use the double sided tape (must be the dollar store kind - just sticky enough to do the trick, but not sticky enough to ruin the money) to adhere the rolls of money to the sides. The tape goes on the outside, as though you are tying a ribbon around the money but instead you affix the tape to the poster board and slip a roll under it and continue all the way around.
Next you use the tape as your guide and put ribbon around each layer, using your glue gun at the start and the finish to keep it in place. We choose to layer black ribbon on top of white ribbon. The first layer relies on the tape except at the ends. The second layer is glued every two inches or so, all the way around (See pictures below).
Next we centered our lovely bride and groom on the top layer and hot glued them in place and began to decorate the cake with silk flowers (hot glued in place) and money origami (do not glue).
The Hat Box made for a truly elegant look and is practical for future use. The cake fits perfectly inside and no wrapping is required. This was a really fun project and seeing the smiles and appreciation from the happy couple was a welcome respite from the constant worry that fills my mind these days.
Family is everything.


No comments:
Post a Comment